

Compatability
Find details on supported systems, plugin formats, DAW compatibility, and basic requirements.
Manual
View setup instructions, feature guides, workflow tips, and help for using the plugin.
Contact Us
Reach out with support questions, technical issues, account help, installation problems, or general inquiries.
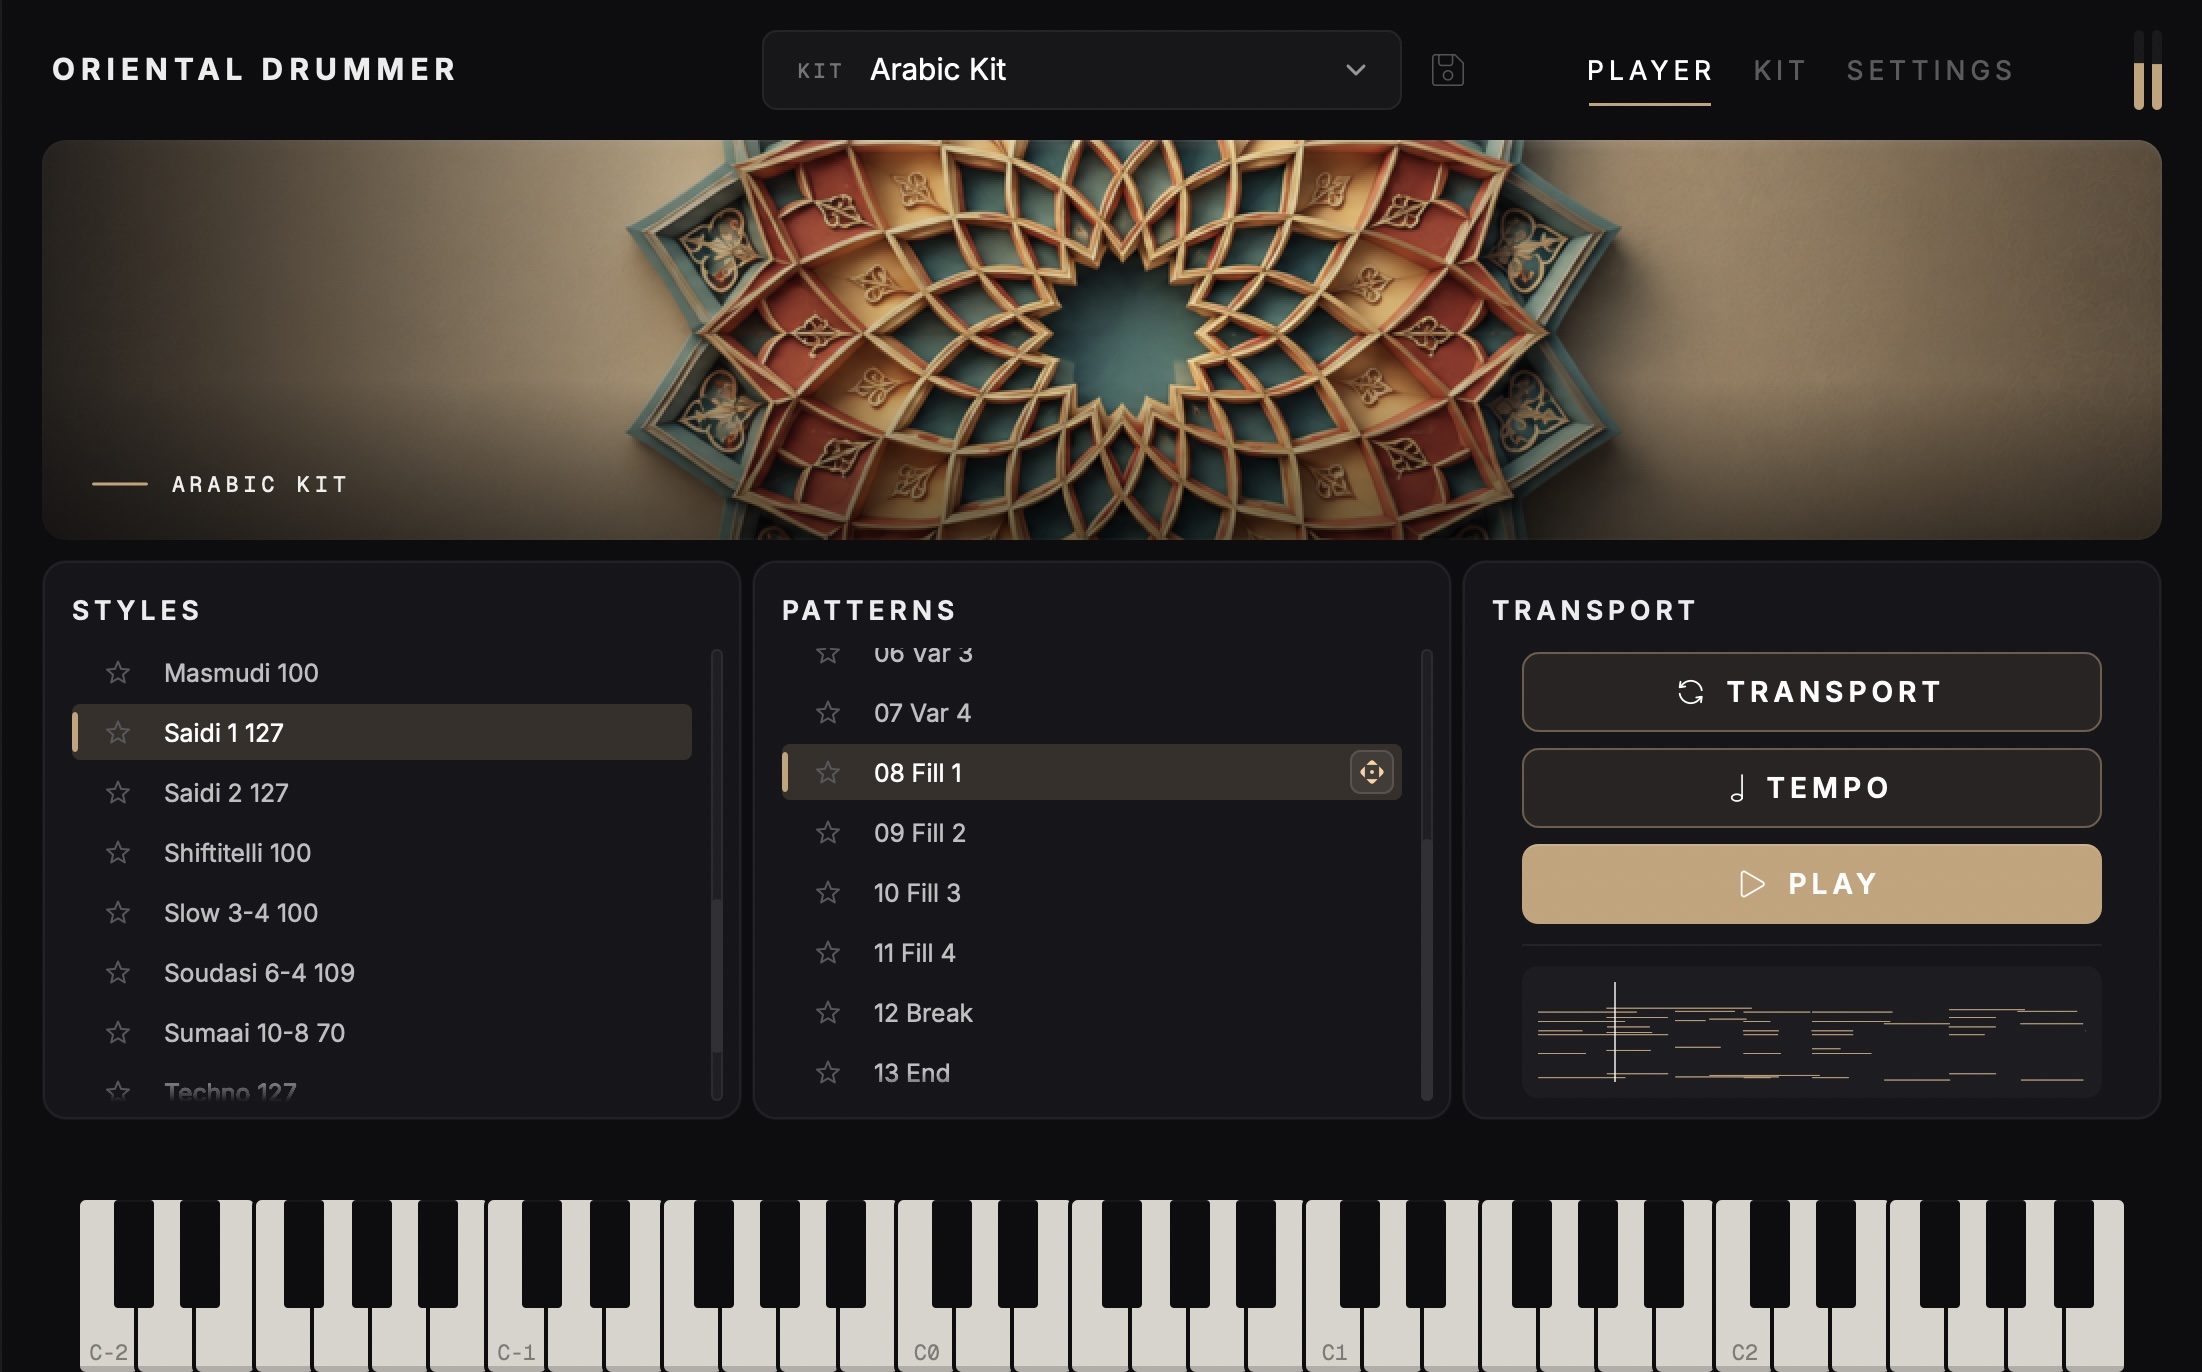
Styles Section
Browse the available styles for each kit, with the original tempo listed next to each style name
Patterns Section
View the 13 patterns included in each style with 3 intros, 4 variations, 4 fills, a break, and an ending
Transport Section
Control pattern playback inside the plugin, sync playback and tempo with your DAW, and move through the MIDI pattern using the playhead
Transport Button
Syncs the plugin playback with your DAW’s transport so the selected MIDI pattern plays when you press play in your DAW
Tempo Button
Syncs the MIDI player to your DAW’s tempo so patterns follow the BPM of your current session
Play Button
Plays the selected MIDI pattern directly inside the plugin for quick auditioning
MIDI Visualizer
Displays the contents of the selected MIDI pattern, allowing you to see the rhythm and playback position as the pattern plays
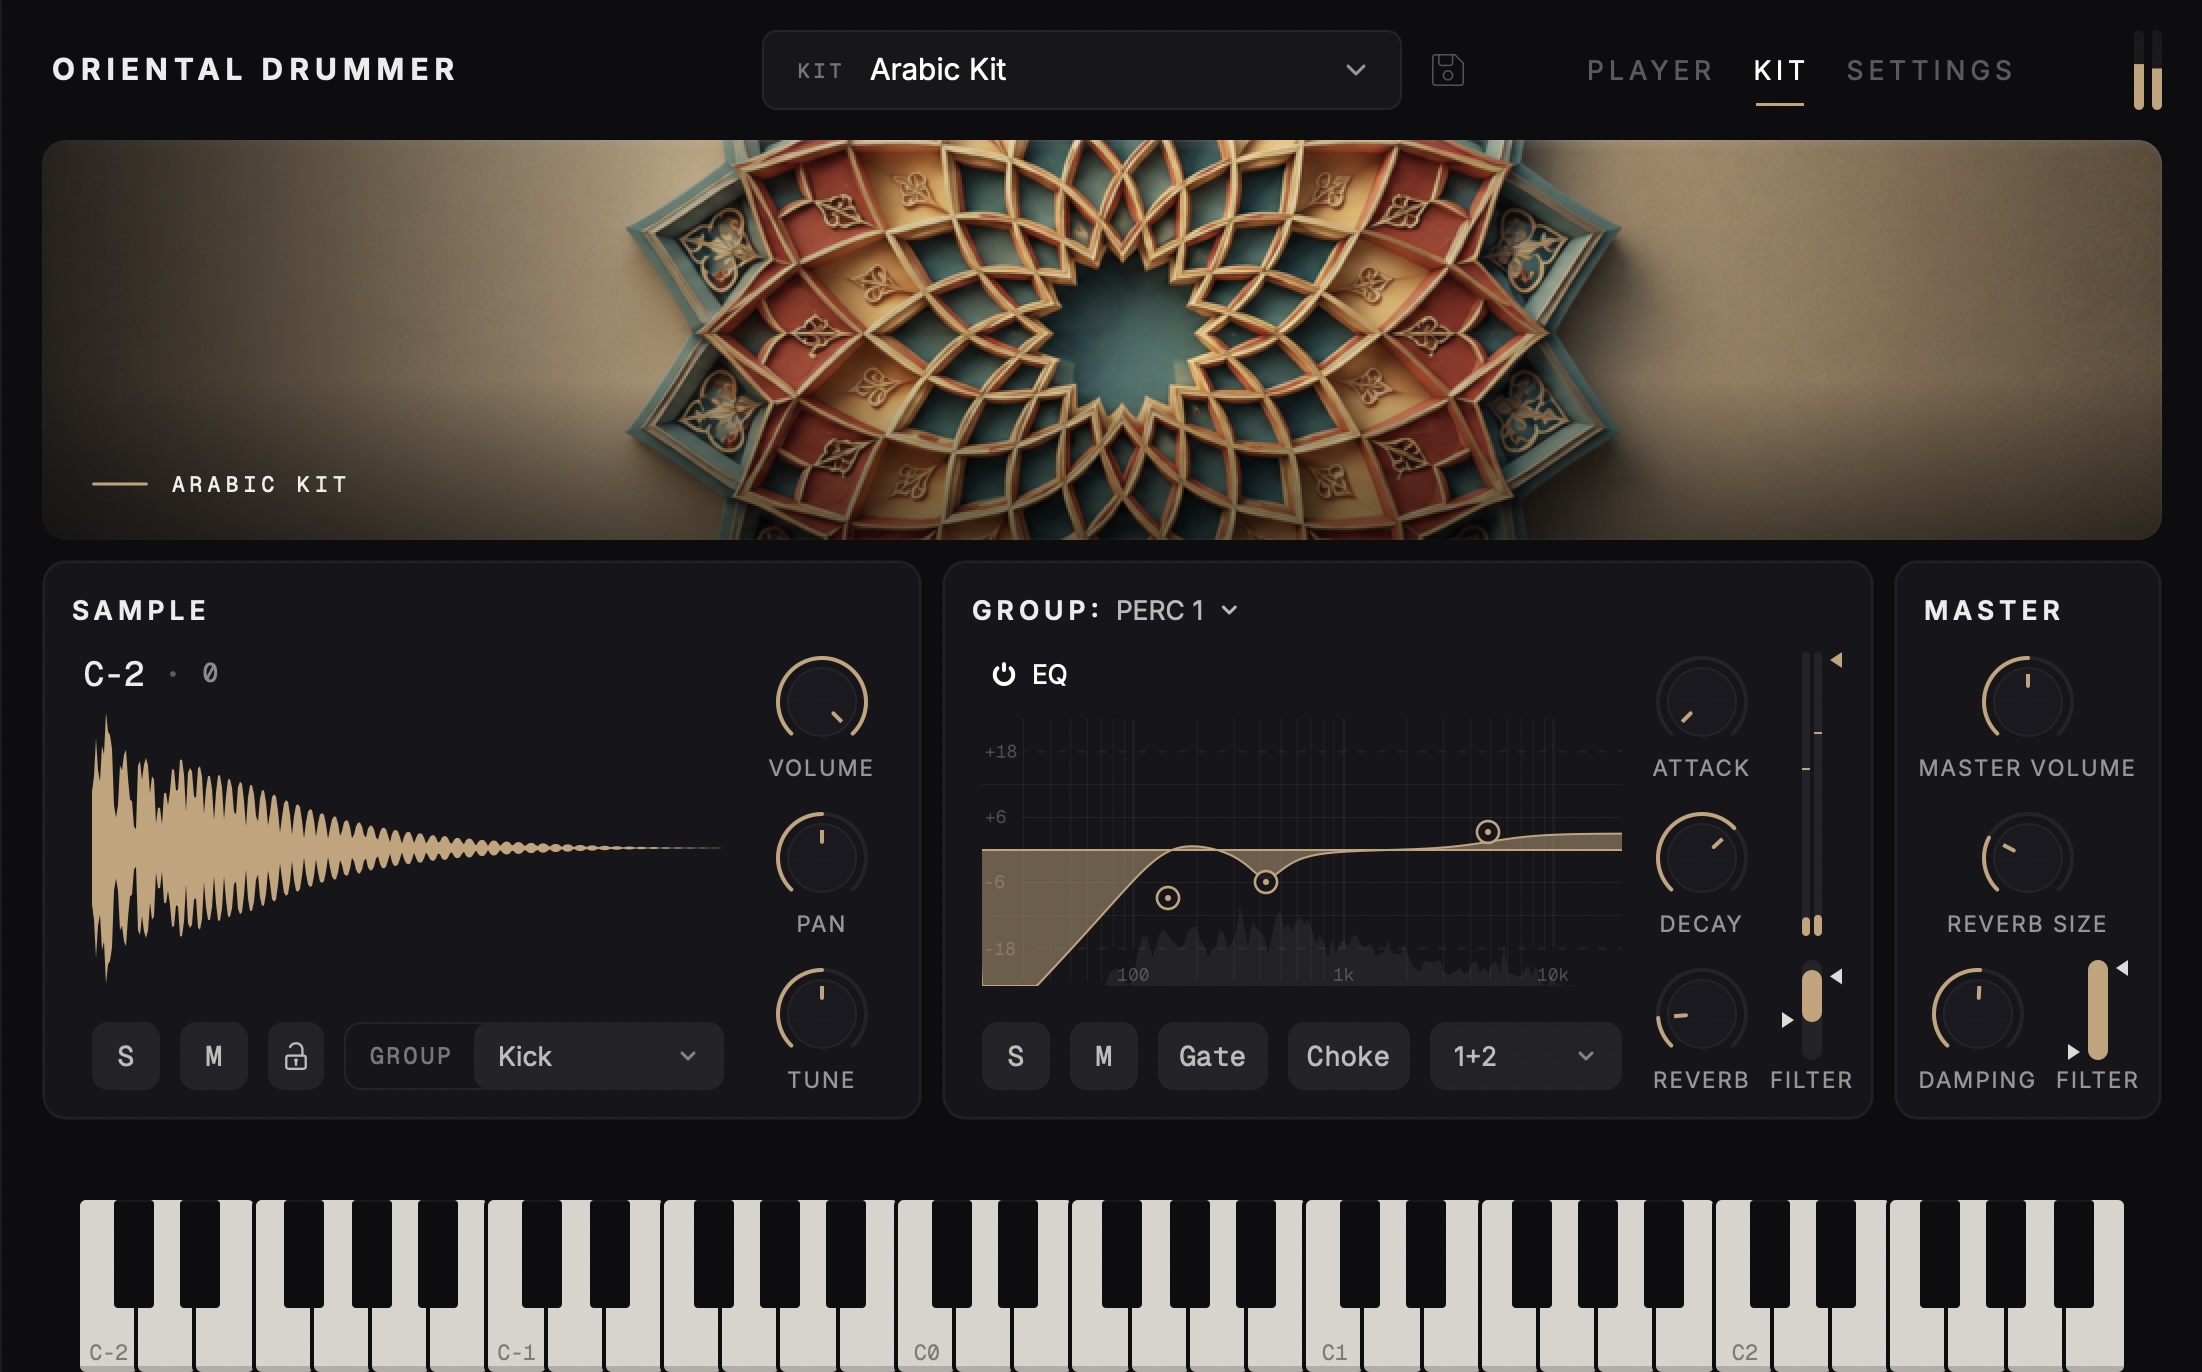
Sample Section
Displays the selected sample’s waveform and lets you adjust its volume, pan, tuning, mute, solo, lock state, and group assignment.
Group Section
Lets you shape and mix each of the 16 groups with EQ, envelope, reverb send, filtering, level control, solo, mute, gate, choke, and output routing
Master
Controls the overall output level of the kit and lets you shape the internal reverb with size, damping, high-pass, and low-pass filter settings
Group Assignment
Each sample can be assigned to one of 16 groups, allowing you to organize, edit, mix, and route related sounds together
Sample Solo, Mute, and Lock
Solo isolates the selected sample, Mute silences it, and Lock keeps the display fixed on the selected sample so you can continue editing it while MIDI playback triggers other sounds.
Group Parametric EQ
Shape the selected group with adjustable EQ bands, view the signal with the spectrum analyzer, and right-click for additional options
Group Output
Assign the selected group to one of 16 available outputs for separate mixing and routing inside your DAW
Group Solo, Mute, Gate and Choke
olo isolates the selected group, Mute silences it, Gate ties sample playback to the length of the MIDI note, and Choke stops the previous sample when a new MIDI note in the group is triggered.
Sample Volume, Pan, and Tune
Use these knobs to adjust the selected sample’s level, stereo position, and pitch
Attack, Decay, and Level
Adjust the group envelope with the Attack and Decay controls, then use the Output level to change the overall volume of the group
Reverb Send
Adjust the amount of signal sent to the reverb and filter the frequency range before it reaches the reverb effect; reverb is only applied to outputs 1-2
Master Reverb
Adjust the overall reverb size and decay, then use the filters to shape the reverb signal and control its low and high frequency range.
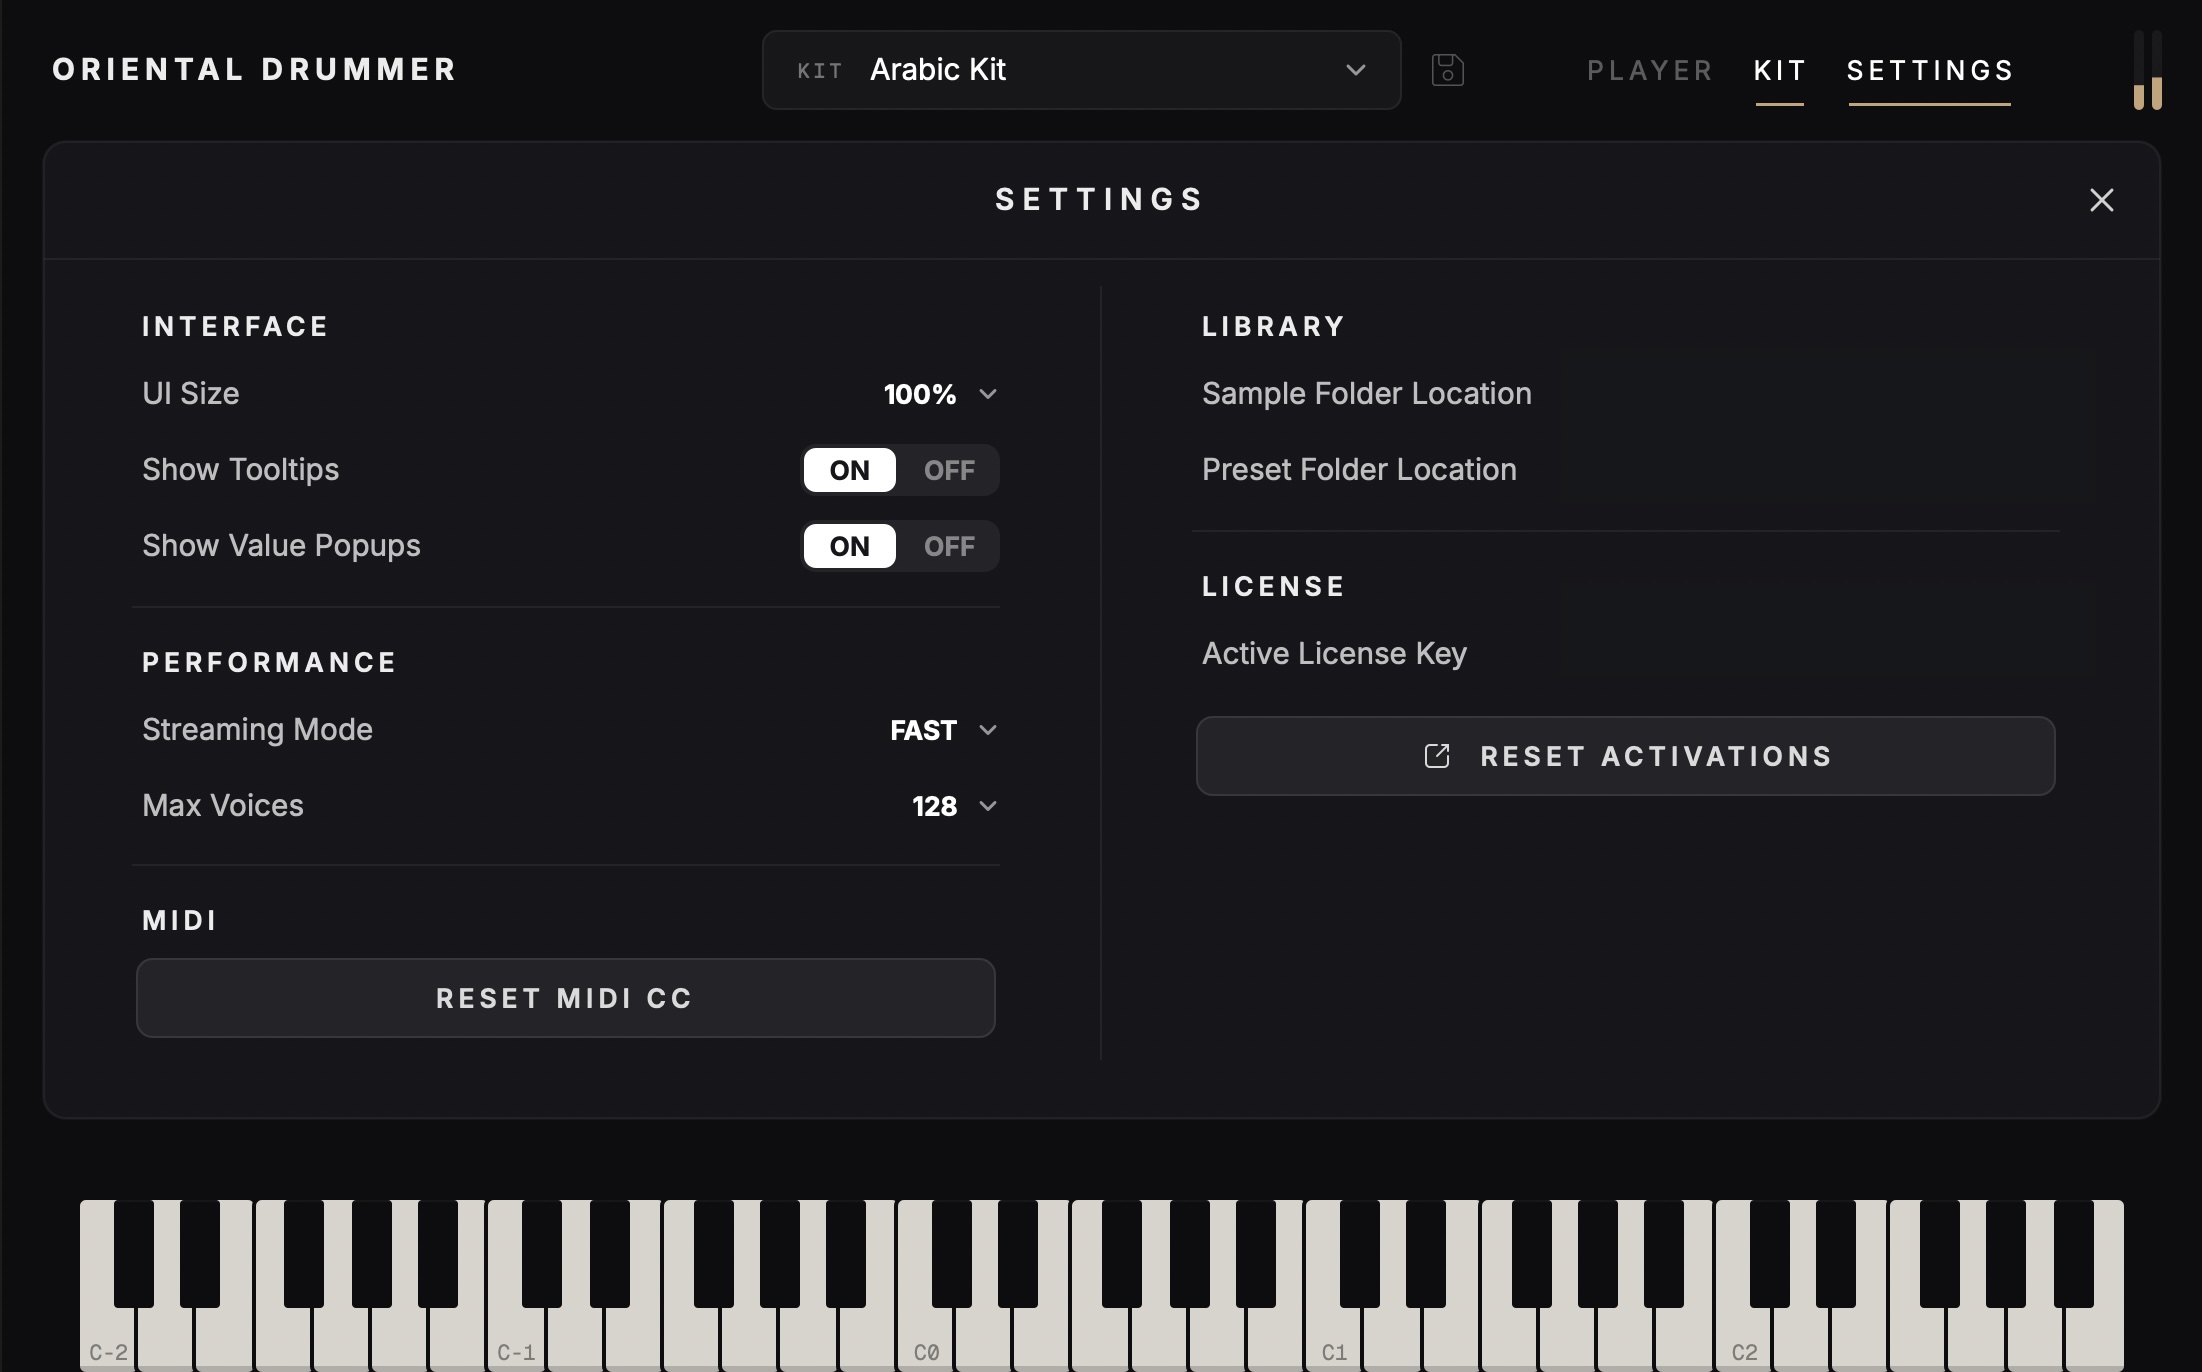
Interface Section
Adjust the UI Size, enable or disable Tooltips, and choose whether Value Popups appear when editing controls
Performance Section
Adjust the Streaming Mode to control sample playback behavior and set the Max Voices to manage how many sounds can play at the same time
MIDI Section
Reset MIDI CC mappings from the MIDI section, or right-click any knob to assign it to a MIDI CC for hands-on control
Library Section
View the Sample Folder Location and Preset Folder Location to see where the plugin’s installed content and saved presets are stored on your computer
License Section
write a sentence for the license section which shows the active license key and allows you to reset your activations